Felted Wall Basket

Materials List
Materials List
80 yards of bulky yarn
or 176 yards of worsted knit with two strands held together.
Thread based carry
along yarns may be knit with the wool yarn as well,
Needles
#13/9mm -16"
length circular needle
#13/9mm DPNs (2)
3 needle markers
and 1 unique starter marker
- Must use yarn that will felt. This project may be knit double stranded with worsted yarn, or aran and dk together, or with a single stranded with bulky yarn.
- This will be a stash busting type pattern for you, I hope!
- I chose an aran weight yarn, Cascade Pastaza #10, (a rusty orange) and Twilley's of Stamford-Freedom Spirit, #511 (because of all the fall hues) a dk weight yarn.
- This is an adventurous beginner type pattern.
Knit the base
 CO 9 sts to the circular needle,
with 2 strands worsted, or 1 strand each aran and dk weight or 1
strand bulky. (Allowing a 20" yarn tail, I used the long tail cast on
method).
CO 9 sts to the circular needle,
with 2 strands worsted, or 1 strand each aran and dk weight or 1
strand bulky. (Allowing a 20" yarn tail, I used the long tail cast on
method).
The base is knit flat with the
circular needles.
Row 1-18: Knit in stockinette stitch for 18 rows, begin with a knit row, end with a purl rowl.
Row 1-18: Knit in stockinette stitch for 18 rows, begin with a knit row, end with a purl rowl.
Row 19: Knit one more row. At end of this 19th row, do not
turn work, place marker (pm) on RH ndl. Working around sides of base as
follows:
pu (pick up and knit) 9 sts
along the left edge, (insert needle through the middle of every other last
st of each row),pm on RH ndl to mark corner,
pu 9 sts across the CO edge, (insert
needle under the two loops of the cast on edge)pm on RH ndl to mark corner,
pu 9 sts along last side, (insert
needle through the middle of the every other last st of each row),
place a unique marker at the
corner to indicate the start of round [This is the “starter marker” (Stm)].
Join with round 1 to begin to
knit in the round. Total 36 sts.
Round 1: Purl 36 sts
Round 2: *K8, Kfb; repeat from * to Stm. (40 sts)
Rounds 3-5: Knit 40 sts.
Round 6: *Kfb, k8, kfb, slm; repeat from * to Stm. (48
sts).
Rounds 7-29:
K48 sts.
Round 30:
SSK, k8, K2tog, slm, k12 (front), slm, k2tog, k8, ssk, slm, p4, k4, p4
(back). (44 sts)
Round 31:
K44 sts. (suggestion: use a solid CC, and use same for the bind off)
Round 32:
P44 sts. (suggestion: use a solid CC, and use same for the bind off)
Bind off the top as follows:
Round 33: (with optional CC) [Hint: You may find it easier
to use a second ndl, (a DPN) as the RH ndl for this bind-off.]
Using the knit cast on method,
add 3 st to the LH ndl as follows: Knit 1, return st back to LH ndl. Repeat two
more times. Three new sts are now on the LH ndl. K2 tbl (new sts), k2tog
tbl [1 new and 1 original], slip these 3 sts back to LH ndl.
*Bring yarn across
the back of sts, K2 tbl, k2tog tbl. Slide these 3 sts back to LH ndl; rep from
* until all sts are BO the LH ndl. Use LH ndl tip to bring the 2nd
st over 1st st, pass 3rd st over 2nd.
One st remains on RH ndl. Bind it off as follows: cut working yarn with a 4”
tail to thread a tapestry needle, bring this through the last st on the right
to bind it off. Insert tapestry needle horizontally under both top loops of the
1st BO st on the left and down through the middle of the last bound
off st on the right for a “seamless” appearance. Secure end on the WS.
Knit the Handle
Hold project with the opening up and the
front side close to you. There are two sets of purl sts (from round 30), one on
right and one on the left of the back side. Pick up and knit (pu) sts with same
thickness of yarn as main piece as follows: begin on right side set and working
right to left: pu 4 sts in the purl bumps with a DPN. Slide these 4 sts
to the opposite end of same dpn. Bring working yarn across the back of the 4
sts, and secure it to the yarn tail (weave yarn tail on the inside, it won’t
show with felting).
Now you are ready to begin the handle!
K2 , *wyif, sl 2 sts as if to
purl without working them, turn. Working yarn is in the middle of the 4 sts on
the ws.
Bring across back of the 2 sts
and K2; repeat from * until the stretched measurement is 9” long handle.
Stretching on the flat cord while it is still on the needle, will pull the sts
into place.After reaching the 9" length, knit across the 4 sts.
This photo shows the handle after it has been felted, on the back of the project.
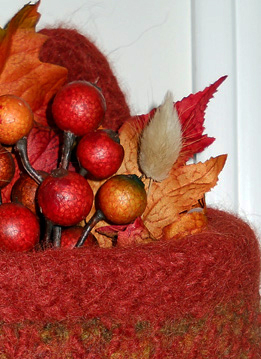
Blocking, Shaping, and Finishing the Felted Project!
(Finished photo below!)

Finishing
When the felted wall basket has dried it may
be decorated with ribbons, beads & buttons. Another design idea is to place
2 decorative buttons on the inside of the bowl through the rim to further
stabilize the knit handle.
And yet another design option is to omit the knit handle and attach an 8" long sew on leather handle!
And yet another design option is to omit the knit handle and attach an 8" long sew on leather handle!

Before felting!
Felted Wall Basket Copyright
©2015 Carol Bristol Designs
This pattern is available for
personal use only.Not to be reproduced or re-knit for profit.
No comments:
Post a Comment
Note: Only a member of this blog may post a comment.